diagram.json above and paste its wiring in to load the circuit. The same wiring covers both parts.
🎯 Objective
By the end of this project, you will:
- Explain the difference between the request/response model of a web server and the publish/subscribe model of MQTT, and why the second one scales.
- Use the vocabulary every MQTT platform shares: broker, topic, publish, subscribe, QoS.
- Talk to a raw MQTT broker with the PubSubClient library: no platform wrapper, no account, just Wi-Fi and a broker address.
- Send real sensor readings to a broker and receive a command back through a callback function, and act on it.
- Keep a network connection alive in
loop(), and recover from a drop without rebooting. - Move the same idea to a managed platform, Ubidots, and build a dashboard someone else can use from anywhere, with no code on their side.
1Why MQTT
In Projects 5 to 9 the ESP32 was a web server: your phone had to be on the same Wi-Fi and had to keep asking for data. MQTT flips that around. Devices publish messages to a broker, and anyone interested subscribes. It is lightweight and works from anywhere with internet, and because the broker sits in the middle, the device and whoever is watching never need to know about each other directly.
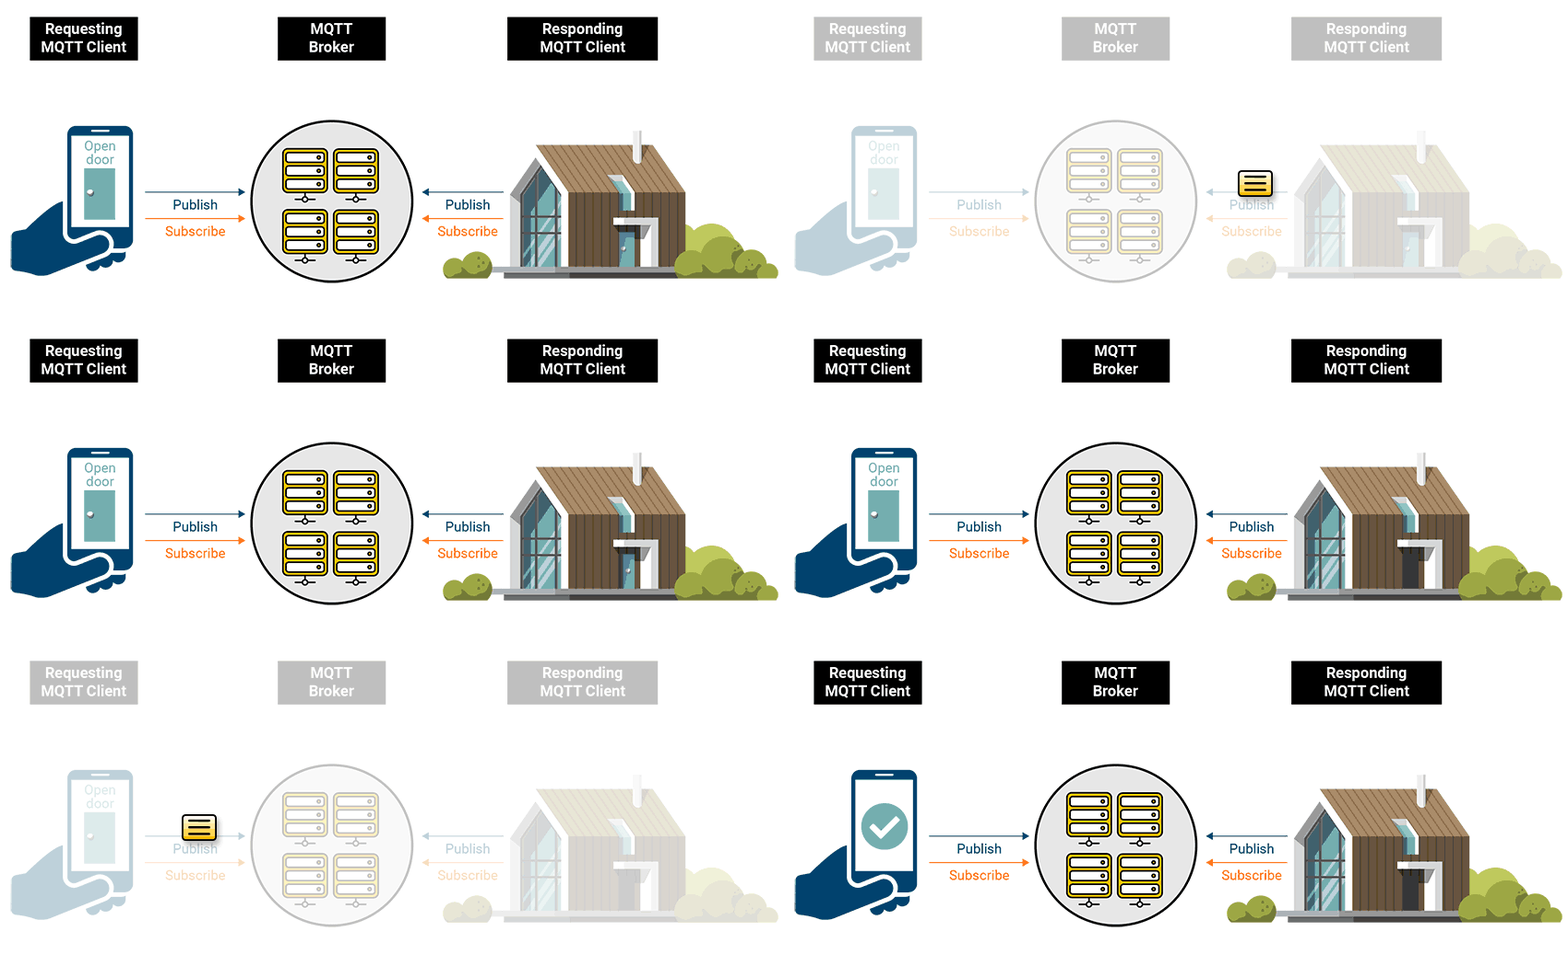
| Term | Meaning | Here |
|---|---|---|
| Broker | Server that routes all messages | Part 1: any broker you choose. Part 2: Ubidots hosts it for you |
| Publish | Send a value to a topic | ESP32 sends temperature, humidity |
| Subscribe | Ask to receive a topic | ESP32 listens for the LED command |
| QoS | How hard the broker guarantees delivery (0, 1, or 2) | QoS 0, see below |
MQTT actually defines three Quality of Service levels: QoS 0 fires a message and does not wait for confirmation, QoS 1 guarantees it arrives at least once (a duplicate is possible), and QoS 2 guarantees exactly once at the cost of extra round trips. PubSubClient, the library both parts of this project run on (directly in Part 1, wrapped by Ubidots' library in Part 2), can only publish at QoS 0. That is the right trade for a sensor reading: a lost temperature publish is replaced by the next one 5 seconds later, cheaper than the extra network round trips QoS 1 or 2 would add.
PART 1 · TALK TO A BROKER DIRECTLY
2Choose a broker
Every MQTT platform, Ubidots included, is a broker underneath with extra features bolted on. Before adding any of those features, Part 1 connects straight to the broker so you see what is actually happening on the wire. You have three options, and the sketch does not care which one you pick, only the address in the edit block changes:
| Option | Good for | Notes |
|---|---|---|
A public test broker, e.g. test.mosquitto.org (port 1883) | Getting started in minutes | Free, no account, but shared by strangers on the internet: never send anything private through it, and messages can be seen by anyone subscribed to your topic |
| Run your own, e.g. Mosquitto on a laptop or Raspberry Pi | Learning what a broker actually does, working offline on a local network | Install Mosquitto, then use your computer's local IP address as MQTT_BROKER |
| A hosted broker, e.g. HiveMQ Cloud or CloudMQTT free tier | A broker with the reliability of a public test one but private to you | Free tiers usually add a username, password, and a TLS port instead of 1883 |
Whichever you pick, note the host, the port (1883 for plain MQTT, 8883 for MQTT over TLS), and, if the broker requires one, a username and password. Those four values are all Part 1's sketch needs.
3Install the required libraries
From the Arduino Library Manager (setup: Foundation 3):
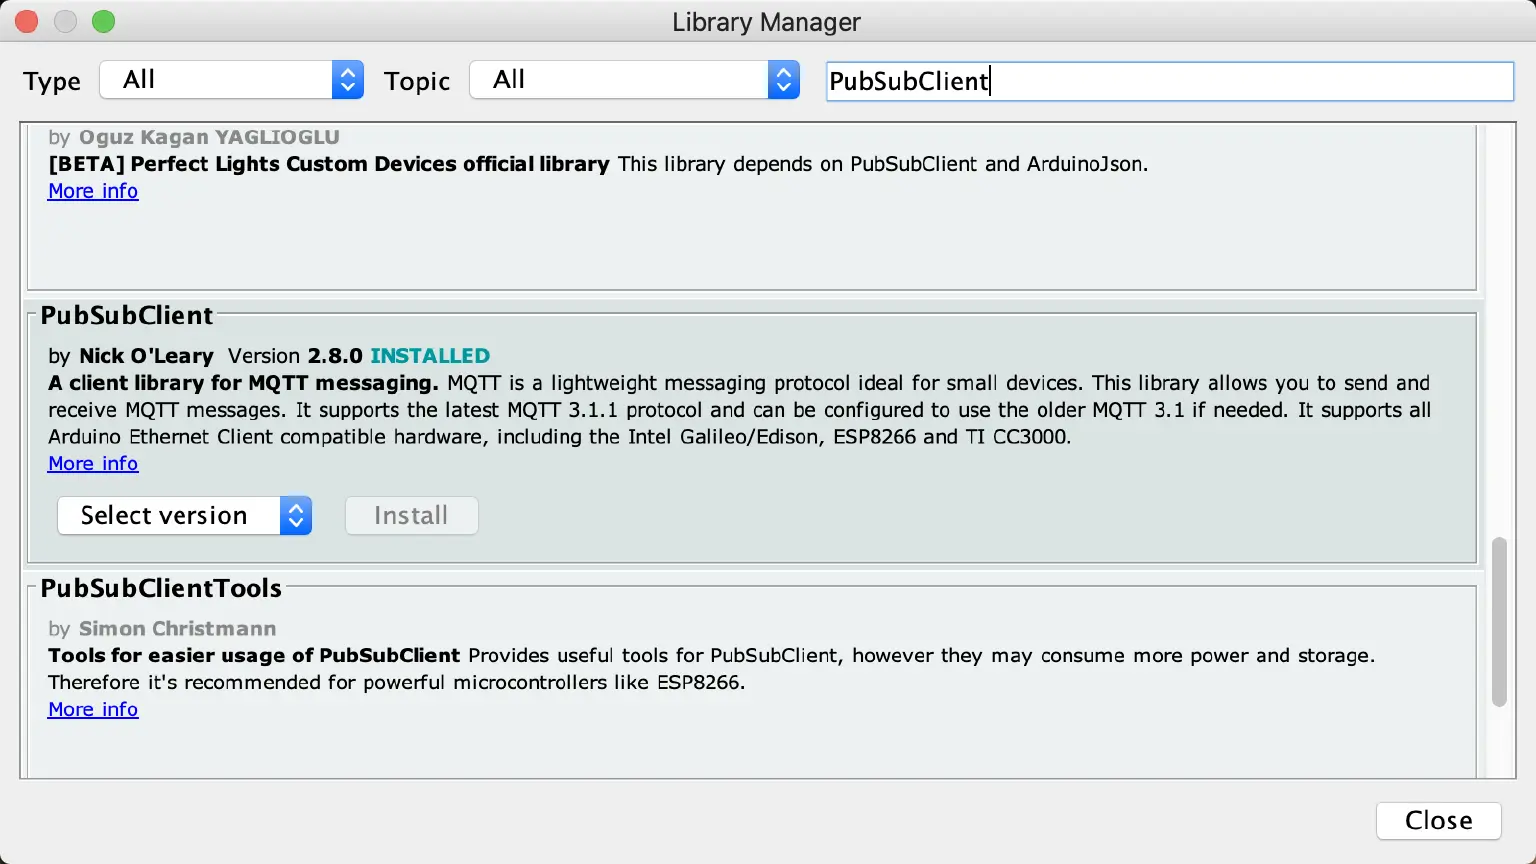
- PubSubClient (by Nick O'Leary), the MQTT client this whole project is built on
- DHT sensor library (Adafruit)
- Adafruit Unified Sensor (dependency of the DHT library)
WiFi.h ships with the ESP32 core, no install needed.
4Parts and wiring
| Qty | Part | Notes |
|---|---|---|
| 1 | ESP32 · breadboard · jumper wires | as always |
| 1 | DHT11 module | S to GPIO 4, + to 3.3 V, - to GND (same as Project 9) |
| 1 | LED + 220 Ohm, or the relay from Project 7 | to GPIO 26 (the thing MQTT switches) |
5Set your broker details and upload
Open Part1_Generic_MQTT/Part1_Generic_MQTT.ino and edit the marked block at the top: WIFI_SSID, WIFI_PASS, MQTT_BROKER, MQTT_PORT (from step 2), MQTT_USER/MQTT_PASS (leave blank if your broker needs no login), MQTT_CLIENT_ID, and the three TOPIC_* values, each unique with your own name so your board does not collide with another student's on a shared broker. Upload, then open Serial Monitor at 115200:
==============================================
 Project 11 Part 1: ESP32 + MQTT (generic broker)
==============================================
DHT11 data -> GPIO 4
Output      -> GPIO 26
Connecting to MyHomeWiFi.....
Wi-Fi connected, IP: 192.168.1.42
Connecting to broker test.mosquitto.org... connected.
Subscribed to esp32/workshop-salah/led
Connected. Publishing readings and listening for commands.
----------------------------------------------
[PUB] temperature: 24.6 C, humidity: 41.0 %
[MQTT] message on esp32/workshop-salah/led: ON
[LED] ON
6Code Walkthrough: Understanding the Sketch (Part 1)
Part1_Generic_MQTT.ino is the first sketch that talks both ways with something outside the room, and the first to speak MQTT without a platform library doing the work for you. Here is how it works.
Step 1: One block holds everything platform-specific
const char *WIFI_SSID = "REPLACE_WITH_YOUR_SSID";
const char *WIFI_PASS = "REPLACE_WITH_YOUR_PASSWORD";

const char *MQTT_BROKER = "REPLACE_WITH_YOUR_BROKER_URL";   // e.g. test.mosquitto.org
const int   MQTT_PORT   = 1883;
const char *MQTT_USER   = "";   // leave blank if the broker needs no login
const char *MQTT_PASS   = "";

const char *MQTT_CLIENT_ID = "esp32-workshop-REPLACE_WITH_YOUR_NAME";

const char *TOPIC_TEMPERATURE = "esp32/REPLACE_WITH_YOUR_NAME/temperature";
const char *TOPIC_HUMIDITY    = "esp32/REPLACE_WITH_YOUR_NAME/humidity";
const char *TOPIC_LED         = "esp32/REPLACE_WITH_YOUR_NAME/led";   // send "ON" or "OFF"

const int   PUBLISH_EVERY_MS = 5000;   // send readings every 5 seconds
Everything that changes if you move to a different broker, or later to Ubidots in Part 2, is gathered in one place. That is deliberate: the rest of the sketch reads the same no matter which broker MQTT_BROKER points at.
MQTT_CLIENT_ID must be unique per device connected to the broker at once. Two boards connecting with the same ID fight over the connection and keep kicking each other off, a confusing failure the first time you see it. The topic names carry the same unique name so two students' readings and commands never land on the same topic.
Step 2: Two objects, two responsibilities
DHT dht(DHTPIN, DHTTYPE);
WiFiClient espClient;
PubSubClient client(espClient);
dht is Project 9's sensor object, unchanged. PubSubClient needs a raw network connection to speak MQTT over, which is exactly what WiFiClient provides, so client wraps espClient. That is the whole relationship Ubidots' library hides from you in Part 2: a Wi-Fi socket, with an MQTT client speaking through it.
Step 3: callback(), the broker talking back
void callback(char *topic, byte *payload, unsigned int length) {
  char message[16] = {0};
  unsigned int n = (length < sizeof(message) - 1) ? length : sizeof(message) - 1;
  memcpy(message, payload, n);

  Serial.printf("[MQTT] message on %s: %s\n", topic, message);

  if (strcmp(message, "ON") == 0) {
    digitalWrite(LED_PIN, HIGH);
    Serial.println("[LED] ON");
  } else if (strcmp(message, "OFF") == 0) {
    digitalWrite(LED_PIN, LOW);
    Serial.println("[LED] OFF");
  }
}
This function is never called by your code. You hand it to the library, and the library calls it whenever a message arrives on a topic you subscribed to. That inversion has a name, callback, and it is how almost all event-driven networking works, on this board or any other.
The payload arrives as raw bytes with a length, not a C string, so it has no terminating zero. Copying at most 15 bytes into a zeroed 16-byte buffer guarantees one, which is what makes strcmp() safe. Without the n guard, a long payload would write past the end of message.
Comparing the exact text "ON" and "OFF" is one valid design; Part 2's Ubidots sketch instead treats the payload as a number, because that is what a dashboard switch widget sends. Same idea, two payload formats, both legitimate.
Step 4: connectBroker(), a reconnect helper
void connectBroker() {
  while (!client.connected()) {
    Serial.printf("Connecting to broker %s...", MQTT_BROKER);
    bool ok = (strlen(MQTT_USER) == 0)
      ? client.connect(MQTT_CLIENT_ID)
      : client.connect(MQTT_CLIENT_ID, MQTT_USER, MQTT_PASS);

    if (ok) {
      Serial.println(" connected.");
      client.subscribe(TOPIC_LED);
      Serial.printf("Subscribed to %s\n", TOPIC_LED);
    } else {
      Serial.printf(" failed, rc=%d, retrying in 2s\n", client.state());
      delay(2000);
    }
  }
}
PubSubClient::connect() has two forms: pass just a client ID for a broker with no login, or add a username and password for one that requires them. The ternary picks the right one from whether MQTT_USER was left blank. On success, the function immediately re-subscribes: a fresh connection to a broker remembers nothing about what you were listening to before.
Step 5: setup() connects, then subscribes
connectWifi();
client.setServer(MQTT_BROKER, MQTT_PORT);
client.setCallback(callback);
connectBroker();
The order matters. Wi-Fi first, because MQTT needs a network. Then tell the client which broker to talk to and register the callback, so no message can arrive before there is somewhere to deliver it. Only then connect.
Step 6: loop() keeps the link alive and publishes on a timer
if (!client.connected()) {
  connectBroker();
}
client.loop();   // lets the library process incoming messages

if (millis() - lastPublish > PUBLISH_EVERY_MS) {
  float t = dht.readTemperature();
  float h = dht.readHumidity();

  if (isnan(t) || isnan(h)) {
    Serial.println("[DHT] Failed to read, skipping this publish");
  } else {
    char payload[8];
    snprintf(payload, sizeof(payload), "%.1f", t);
    client.publish(TOPIC_TEMPERATURE, payload);

    snprintf(payload, sizeof(payload), "%.1f", h);
    client.publish(TOPIC_HUMIDITY, payload);

    Serial.printf("[PUB] temperature: %.1f C, humidity: %.1f %%\n", t, h);
  }
  lastPublish = millis();
}
Three jobs, none of them blocking:
- Heal the connection. Wi-Fi drops, brokers restart. Checking
connected()every pass and reconnecting (which also re-subscribes) is the difference between a demo and something that survives a lunch break. - Give the library time to work.
client.loop()is where incoming messages are actually read off the socket and yourcallback()gets invoked. Miss it and nothing arrives. - Publish on a schedule, using Project 4's
millis()timer.PubSubClient::publish()only takes a C string, so each float reading is formatted into a small buffer withsnprintf()first.
Note the isnan() check again: a failed reading skips the publish entirely. Sending a garbage value to a subscriber is worse than sending nothing, because the gap is honest and the spike is not.
delay() had to go. A blocking wait here would stall client.loop(), and incoming commands would arrive late or not at all.Key concepts: what each line really does
| Code | What it does |
|---|---|
PubSubClient client(espClient) | Wraps a raw Wi-Fi socket in an MQTT client. |
client.setServer(MQTT_BROKER, MQTT_PORT) | Tells the client which broker to connect to. |
client.setCallback(callback) | Registers the function the library will call when a subscribed message arrives. |
client.connect(MQTT_CLIENT_ID, ...) | Opens the MQTT connection, with or without a login. |
client.subscribe(TOPIC_LED) | Asks the broker to deliver future messages on that topic. |
client.publish(topic, payload) | Sends one message to a topic. |
client.loop() | Services the MQTT connection. Incoming messages are delivered from here. |
client.connected() | Reports whether the broker link is still up, so loop() can heal it. |
millis() - lastPublish > PUBLISH_EVERY_MS | Project 4's non-blocking timer, now pacing network traffic. |
isnan(t) || isnan(h) | Skips the publish on a bad reading, leaving a gap rather than a lie. |
memcpy into a zeroed buffer | Turns a raw MQTT payload into a proper C string before comparing it. |
7Demonstration: publish and subscribe from your computer
You do not need a second ESP32 to see the other side of MQTT, an MQTT client on your computer or phone does the job:
- MQTT Explorer (desktop app, free) connects to a broker and shows every topic and message visually, easiest for a first look.
- Mosquitto's command-line tools,
mosquitto_subandmosquitto_pub, come with a Mosquitto install and work over SSH too:
# Watch everything under your topic prefix
mosquitto_sub -h test.mosquitto.org -t "esp32/workshop-salah/#" -v

# Turn the LED on from your computer, no code involved
mosquitto_pub -h test.mosquitto.org -t "esp32/workshop-salah/led" -m "ON"
The # in the subscribe command is an MQTT wildcard: it matches esp32/workshop-salah/led, esp32/workshop-salah/temperature, and any other topic under that prefix, all in one subscription. Run the mosquitto_sub command first and watch the ESP32's readings scroll by every 5 seconds, then run the mosquitto_pub command and watch the board's Serial Monitor and LED react within a second.
"on" (lowercase) instead of "ON", does the LED turn on? Try it, then look at callback() again to see why exact string comparison caught you.PART 2 · MOVE TO UBIDOTS
8Why move to a managed platform
Part 1 proved the concept works with nothing but a broker address. Ubidots keeps that same publish/subscribe model underneath (it is still MQTT, still PubSubClient) and adds three things that were missing: it hosts the broker so you do not run one, it stores every reading so you get history for free, and it gives you a dashboard builder so you do not write a single line of charting code. The trade is that you connect to Ubidots' broker and topic scheme specifically, instead of any broker you choose.
9Create your Ubidots account and token
- Sign up for a free Ubidots STEM account at stem.ubidots.com.
- Click your profile icon (top right of the Ubidots dashboard), open API Credentials, and copy the Default token (looks like
BBUS-xxxx). This is the value that goes intoUBIDOTS_TOKENin the sketch, the credential that proves every message came from your account, so treat it like a password. - No need to create the device or its variables by hand first: Ubidots reads
DEVICE_LABELoff the incoming MQTT message and creates the device, and each variable it carries, automatically the first time the board publishes.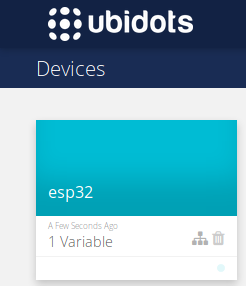
A device appearing in your Ubidots account seconds after the sketch's first successful publish, no manual setup needed. Source: Ubidots, "Connect an ESP32-DevKitC to Ubidots over MQTT" - Open Devices in the Ubidots dashboard any time after uploading the sketch (step 11 below) to confirm your board checked in.
10Install the required libraries (Part 2)
From the Arduino Library Manager, on top of the libraries you already installed for Part 1:
- Ubidots ESP32 MQTT (this also installs PubSubClient, already installed from Part 1)
- DHT sensor library and Adafruit Unified Sensor are reused as-is from Part 1
11Set your details and upload
Wiring is unchanged from Part 1 (step 4 above), nothing to rewire.
Open Part2_Ubidots/Part2_Ubidots.ino and edit the marked block at the top: WIFI_SSID, WIFI_PASS, UBIDOTS_TOKEN, and a unique DEVICE_LABEL. Upload, then open Serial Monitor at 115200:
==============================================
 Project 11 Part 2: ESP32 + MQTT + Ubidots
==============================================
DHT11 data -> GPIO 4
Output      -> GPIO 26
[PUB] temperature: 24.6 C, humidity: 41.0 %
[CLOUD] led -> ON (raw "1")
12Code Walkthrough: Understanding the Sketch (Part 2)
Part2_Ubidots.ino rebuilds Part 1's sketch on Ubidots. Same publish/subscribe idea, a platform library doing the broker connection and topic naming for you. Here is how it works.
Step 1: One block holds everything platform-specific
const char *WIFI_SSID = "REPLACE_WITH_YOUR_SSID";
const char *WIFI_PASS = "REPLACE_WITH_YOUR_PASSWORD";
const char *UBIDOTS_TOKEN = "REPLACE_WITH_YOUR_UBIDOTS_TOKEN";
const char *DEVICE_LABEL = "esp32-workshop";   // a name for THIS board

const char *VAR_TEMPERATURE = "temperature";
const char *VAR_HUMIDITY    = "humidity";
const char *VAR_LED         = "led";   // the control variable we subscribe to

const int   PUBLISH_EVERY_MS = 5000;   // send readings every 5 seconds
Same idea as Part 1's edit block: everything platform-specific in one place. Compare it to Part 1's block and notice what changed, a broker address and topic strings became a token and a device label, and what stayed the same, a unique per-student name and a publish interval.
DEVICE_LABEL is the name your board files data under, so every student needs a different one, exactly like Part 1's MQTT_CLIENT_ID and topic prefix.Step 2: Two objects, two responsibilities
DHT dht(DHTPIN, DHTTYPE);
Ubidots ubidots(UBIDOTS_TOKEN);

unsigned long lastPublish = 0;
dht is Project 9's sensor object, unchanged. ubidots replaces Part 1's WiFiClient + PubSubClient pair: it wraps the same two things, plus the details of Ubidots' topic naming. Handing it the token at construction is what ties this board to your account.
Step 3: callback(), the cloud talking back
void callback(char *topic, byte *payload, unsigned int length) {
  char value[8] = {0};
  unsigned int n = (length < sizeof(value) - 1) ? length : sizeof(value) - 1;
  memcpy(value, payload, n);
  float v = atof(value);

  bool on = (v >= 0.5);          // treat anything from ~1 as "on"
  digitalWrite(LED_PIN, on ? HIGH : LOW);
  Serial.printf("[CLOUD] led -> %s (raw \"%s\")\n", on ? "ON" : "OFF", value);
}
Same inversion of control as Part 1: the library calls this whenever a subscribed value arrives. The difference is the payload format. A dashboard switch widget sends a number, not the text "ON"/"OFF" Part 1 compared against, so this version parses it with atof() instead of strcmp().
v >= 0.5 rather than v == 1 is defensive: a switch may send 1, 1.0, or 1.000000, and comparing floats for exact equality is a bad habit anyway.
Step 4: setup() connects, then subscribes
ubidots.setDebug(true);                        // prints connection details
ubidots.connectToWifi(WIFI_SSID, WIFI_PASS);
ubidots.setCallback(callback);
ubidots.setup();
ubidots.reconnect();
ubidots.subscribeLastValue(DEVICE_LABEL, VAR_LED);
The order matches Part 1's connectWifi() then client.setServer() then client.setCallback() then connectBroker(): Wi-Fi first, then register the callback, then connect, then subscribe.
subscribeLastValue() also asks the broker for the variable's current value, so the board picks up a switch you left on before it booted. That is one thing Ubidots' wrapper adds beyond what Part 1's plain subscribe() does.
Step 5: loop() keeps the link alive and publishes on a timer
if (!ubidots.connected()) {
  ubidots.reconnect();
  ubidots.subscribeLastValue(DEVICE_LABEL, VAR_LED);
}

if (millis() - lastPublish > PUBLISH_EVERY_MS) {
  float t = dht.readTemperature();
  float h = dht.readHumidity();

  if (isnan(t) || isnan(h)) {
    Serial.println("[DHT] Failed to read, skipping this publish");
  } else {
    ubidots.add(VAR_TEMPERATURE, t);
    ubidots.add(VAR_HUMIDITY, h);
    ubidots.publish(DEVICE_LABEL);
    Serial.printf("[PUB] %s: %.1f C, %s: %.1f %%\n", VAR_TEMPERATURE, t, VAR_HUMIDITY, h);
  }
  lastPublish = millis();
}

ubidots.loop();   // lets the library process incoming cloud messages
The same three non-blocking jobs as Part 1's loop(), heal the connection, publish on a timer, give the library time to work, just spelled with Ubidots' method names. One difference worth noticing: add() twice then publish() once sends both readings in a single message, where Part 1 called client.publish() twice, once per topic. Ubidots' variables live under one device, so one message can carry several.
Note the isnan() check again: a failed reading skips the publish entirely. Sending garbage to a chart is worse than sending nothing, because the gap is honest and the spike is not.
delay() had to go. A blocking wait here would stall ubidots.loop(), and cloud commands would arrive late or not at all.Key concepts: what each line really does
| Code | What it does |
|---|---|
Ubidots ubidots(TOKEN) | Creates the client: Wi-Fi, MQTT, topic naming, and your credentials in one object. |
ubidots.connectToWifi(...) | Joins the network, the same job WiFi.begin() did in Project 5. |
ubidots.setCallback(callback) | Registers the function the library calls when a subscribed value arrives. |
ubidots.subscribeLastValue(DEVICE_LABEL, VAR_LED) | Subscribes to led and pulls its current value immediately. |
ubidots.add(VAR, value) | Queues one reading. Several add() calls travel in one message. |
ubidots.publish(DEVICE_LABEL) | Sends the queued readings to the broker, filed under this device. |
ubidots.loop() | Services the MQTT connection. Incoming messages are delivered from here. |
ubidots.connected() | Reports whether the broker link is still up, so loop() can heal it. |
millis() - lastPublish > PUBLISH_EVERY_MS | Project 4's non-blocking timer, now pacing network traffic. |
isnan(t) || isnan(h) | Skips the publish on a bad reading, leaving a gap rather than a lie. |
memcpy into a zeroed buffer | Turns a raw MQTT payload into a proper C string before atof(). |
13Build the dashboard
- In Devices, confirm your device appeared with
temperatureandhumidity. - Add a control variable: open the device, Add Variable, type Raw, name it exactly
led. - In Data, Dashboards, add a Gauge on temperature, a Line chart on temperature and humidity, and a Switch on
led. - Flip the switch. The board's LED or relay follows within a few seconds.
14Customize and explore your dashboard
- Open Data, then Dashboards, and press CREATE to start a fresh dashboard (skip this if you already added widgets to an existing one in the previous step).
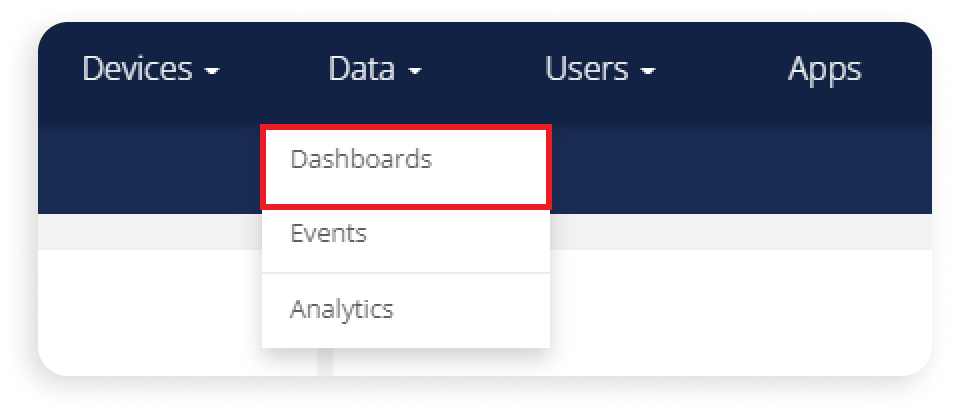
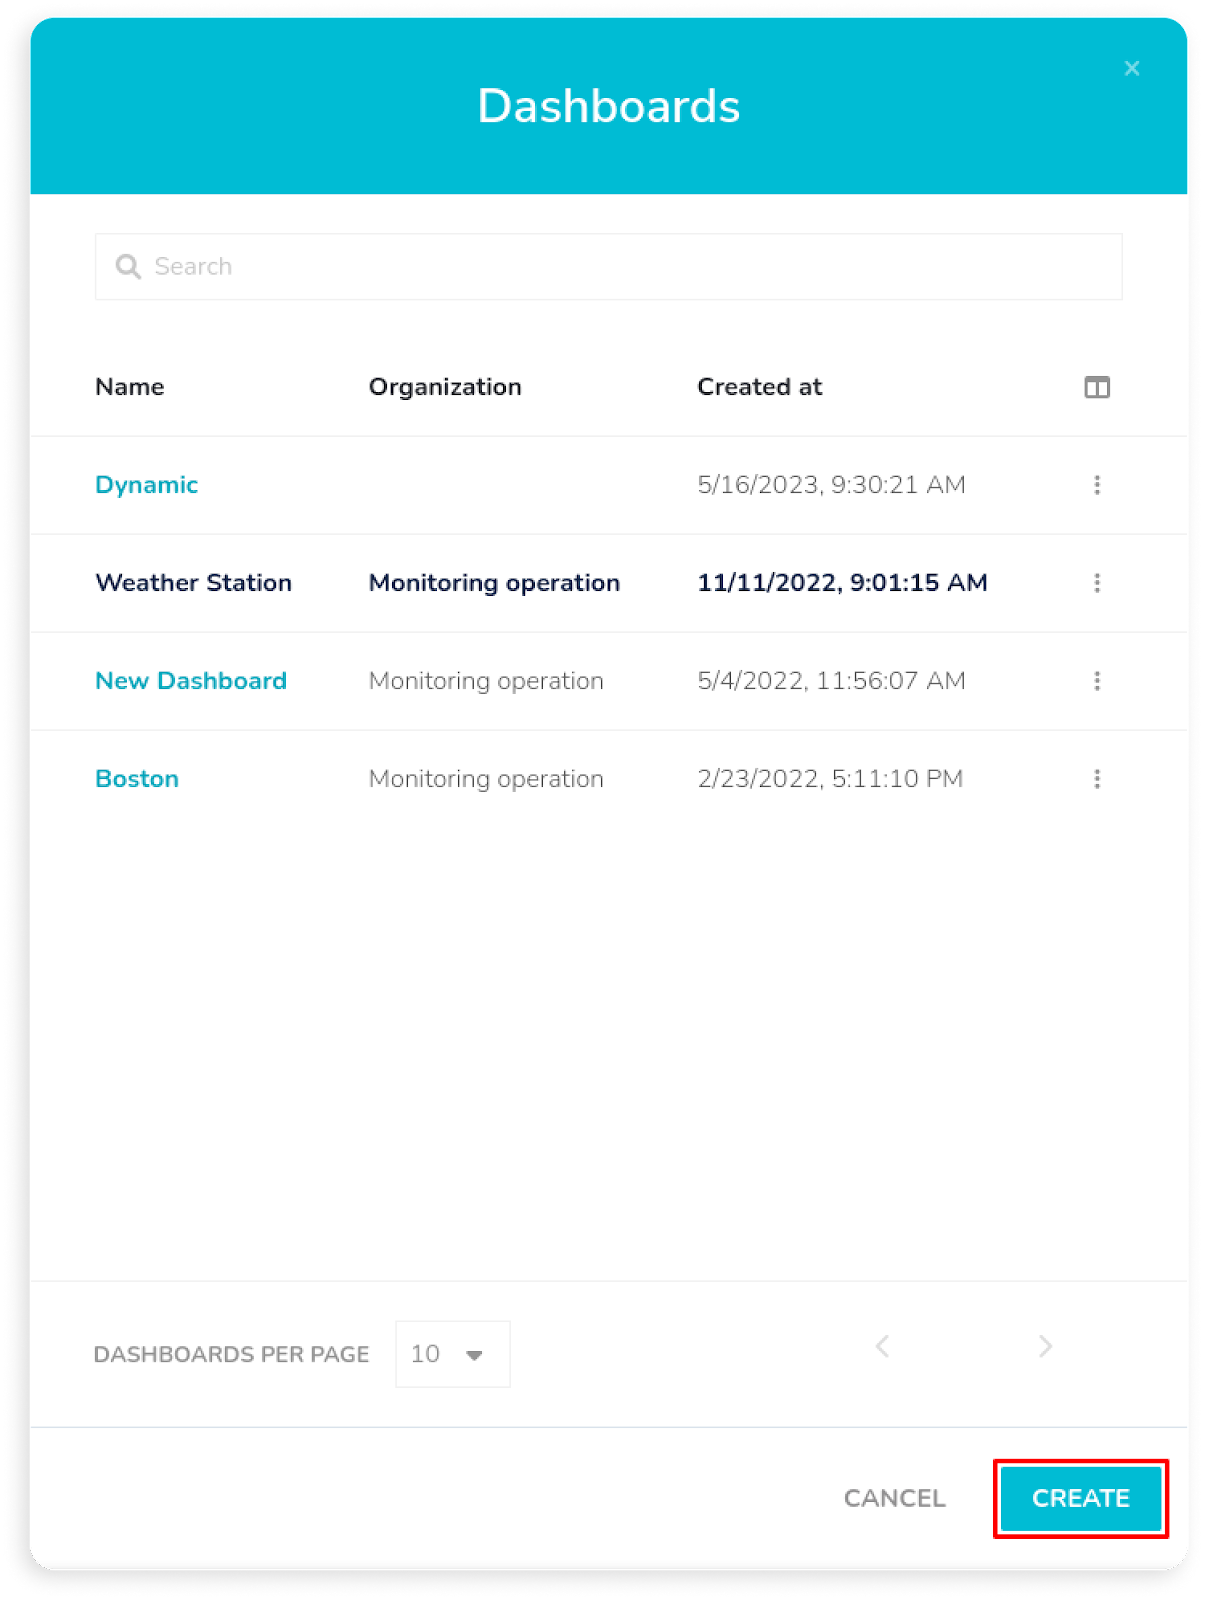
Source: Ubidots, "Create Dashboards and Widgets" - Beyond the Gauge, Line chart, and Switch from the previous step, a Table widget is worth adding too: bind it to
temperatureandhumidityfor a scrollable log of raw readings, useful once the line chart gets crowded. - Use the dashboard's built-in controls to explore without touching the sketch again:
- the date-time picker and the time navigation arrows move the whole dashboard through a different window of history
- full-screen mode (press Esc to exit) is handy for a demo or a wall display
- the real-time toggle turns automatic refreshing on or off
- If a widget stops moving when you change the date range, open it and check that its span is set to "set by dashboard": that is what makes it follow the picker instead of showing a fixed window.
🎯 Knowledge Check
1. How does MQTT differ from the web-server model?
2. Why does every device need a unique client ID (or DEVICE_LABEL in Ubidots) when it connects to a broker?
3. Why must you re-subscribe after a broker reconnect?
4. What does the callback() function do in an MQTT sketch?
5. Why should you check isnan() before publishing a DHT11 reading?
16Wrapping Up: What You've Learned
This is the project where "connected device" stops meaning "same Wi-Fi as my phone", and where you learned the same idea twice: once bare, once wrapped by a platform. The key takeaways:
- Publish/subscribe decouples everyone. The board does not know who reads its data, and a subscriber does not know where the board is. A broker in the middle is what makes that work from anywhere, and Part 1 proved you can point that at any broker you like.
- The loop is now closed: device out (readings) and something back in (the LED command). A device that only reports is a sensor; one that also listens is an IoT device.
- Callbacks invert control. You write the handler, the library decides when to run it. Keep it short and never block inside it.
- Network code must self-heal. Checking
connected()and re-subscribing costs a few lines and is the difference between a demo and something that survives a lunch break. - Non-blocking timing is now mandatory, not a style preference: the MQTT client's
loop()has to run constantly. - A platform wrapper trades choice for convenience. Ubidots picks the broker, the topic naming, and the payload format for you, in exchange for a dashboard and storage you did not have to build. Neither approach is wrong, they are different points on the same trade-off.
- Tokens, like broker passwords, are credentials. They stay in the edit block, out of screenshots, and out of git.
- Bad data is worse than no data. Skipping a publish leaves an honest gap in the chart.
Now try
- Swap brokers with zero logic changes: point Part 1's sketch at a different broker, a different public one, or Mosquitto running on your own laptop, and confirm the sketch still works after editing only the block at the top.
- Cloud-controlled relay: wire the relay from Project 7 to GPIO 26 in place of the LED, and confirm both Part 1's
"ON"/"OFF"commands and Part 2's Ubidots switch still control it, no code changes needed.
17Troubleshooting
| Symptom | Likely cause | Fix |
|---|---|---|
Part 1: rc=-2 when connecting | Wrong broker address or port | Double-check MQTT_BROKER and MQTT_PORT against step 2 |
| Part 1: connects, then keeps dropping | Another device is using the same MQTT_CLIENT_ID | Give this board a unique client ID |
| Part 1: LED never responds | Publishing to the wrong topic, or wrong case ("on" vs "ON") | Match TOPIC_LED exactly, and the string exactly |
| Part 2: Serial stops after Wi-Fi | Wrong token | Re-copy the Default token from Ubidots |
| Part 2: No device in Ubidots | Never published | Check DHT reads numbers, not -- |
| Part 2: Dashboard flat / no data | Wrong DEVICE_LABEL on the widget | Match the label exactly |
| Part 2: Switch does nothing | Variable not named led | Name it exactly led |
| Either part: reconnect loop | 5 GHz Wi-Fi | ESP32 is 2.4 GHz only |
18Going further
- Swap the LED for the relay (Project 7) and you are switching mains-style loads from either Part 1's broker or Part 2's cloud dashboard.
- Add an event in Ubidots (Data, then Events) to email or notify you when temperature crosses a threshold.
- Retained messages. A retained message is kept by the broker and handed to any new subscriber immediately, even if they connect after it was sent.
subscribeLastValue()in Part 2's sketch already gets you a version of that effect for theledcommand (Ubidots remembers the last value and hands it over on subscribe); Part 1's rawclient.publish(topic, payload, true)(the trailingtrueis the retain flag, an overloadPubSubClient::publish()supports but this sketch does not use) does the same thing at the protocol level, so a new subscriber to a topic, including your own board after a reboot, learns the last known value without asking. - Last-Will-and-Testament (LWT). An LWT is a message you register when you first connect that the broker sends on your behalf if your connection drops without a clean disconnect. It's how other subscribers learn a device went offline instead of just falling silent. Part 1's
PubSubClient::connect()call takes optional will-topic, will-QoS, will-retain, and will-message arguments for exactly this purpose (this sketch'sconnectBroker()does not pass them, but they slot into the same call). Ubidots' wrapper in Part 2 manages the connection for you and does not expose those arguments directly. - Reconnect backoff. Both parts'
loop()retry the connection on every single pass while disconnected, which can hammer a struggling broker with attempts. A small backoff fixes that: wait longer between retries each time, and reset once the connection is back. Here it is applied to Part 2'subidots.reconnect(); the same idea drops into Part 1'sconnectBroker()aroundclient.connect():unsigned long lastReconnectAttempt = 0; unsigned long reconnectBackoff = 2000; // start at 2 s // inside loop(), in place of the plain reconnect check: if (ubidots.connected()) { reconnectBackoff = 2000; // back to normal once online } else if (millis() - lastReconnectAttempt > reconnectBackoff) { lastReconnectAttempt = millis(); ubidots.reconnect(); ubidots.subscribeLastValue(DEVICE_LABEL, VAR_LED); reconnectBackoff = min(reconnectBackoff * 2, 30000UL); // cap at 30 s }
This is the same non-blocking-timer idea from Project 4, applied to a retry instead of a debounce. - Read the rest of HiveMQ's MQTT Essentials series for topic wildcards, retained messages, and QoS in more depth than fits here.
- Ubidots' own ESP32 DevKitC MQTT guide walks the same wiring and libraries from their side, a useful second reference if a library update ever changes a call in this sketch.
- This is the backbone of your capstone.