Project_8_Output_State_Synchronization_Web_Server.ino, then open it in the Arduino IDE (setup: Foundation 3). Needs the ESP Async WebServer + AsyncTCP libraries and your Wi-Fi credentials.
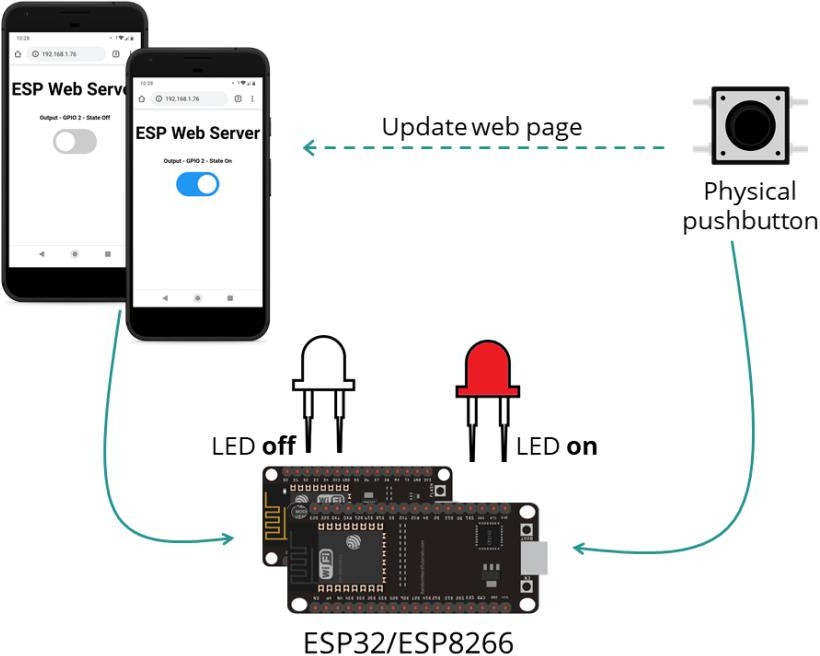
diagram.json above and paste its wiring in to load the circuit.
🎯 Objective
By the end of this project, you will:
- Control one output from two independent sources without them fighting each other.
- Understand why a web page goes stale, and fix it by polling the server.
- Use
setInterval()andXMLHttpRequestto refresh state in the background, with no page reload. - Serve a tiny state endpoint (
/state) that answers with one character. - Debounce a button with
millis()rather thandelay(), so the server keeps responding. - See why the empty
loop()of Project 7 was worth having.
1The synchronization trick
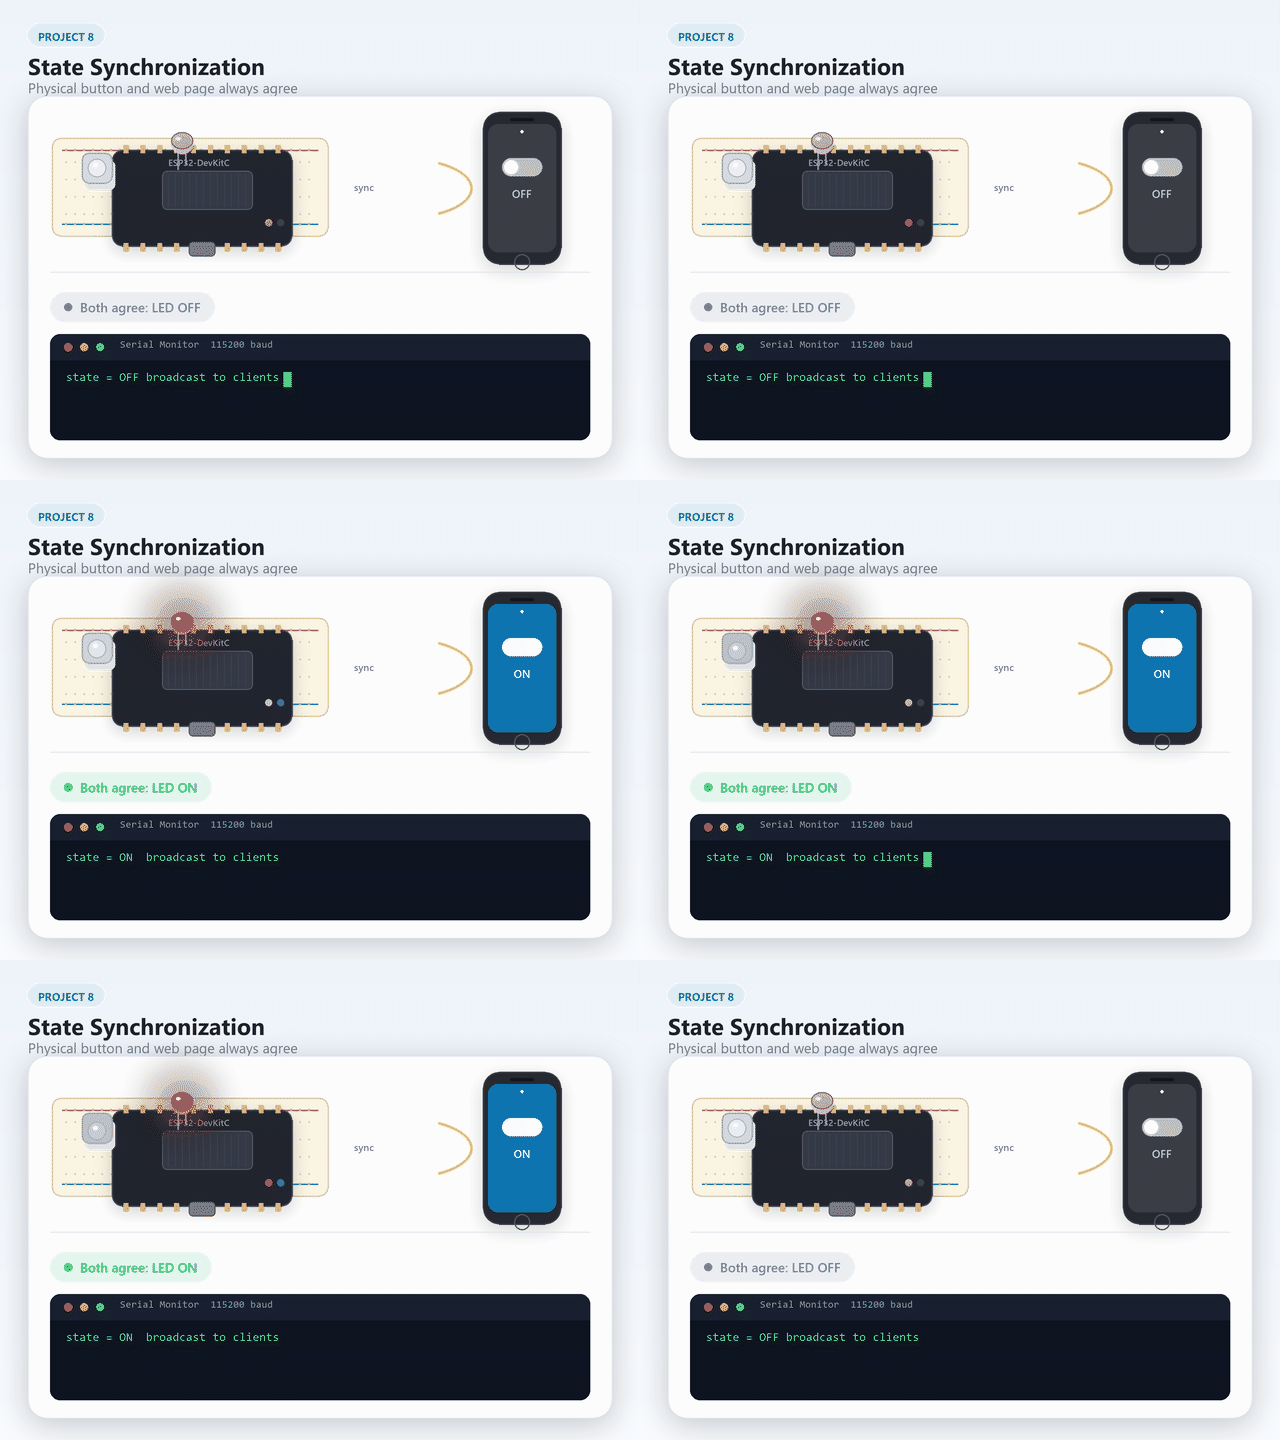
The interesting part is keeping the web page correct when you press the physical button. The page can't know, so it asks. Every second the browser requests /state and updates the toggle to match the real pin:
setInterval(function () {           // once per second
  xhttp.open("GET", "/state", true);  // ask the ESP32 for the state
  ...
}, 1000);
- Web toggle →
/update?state=…→ LED changes. - Physical button → LED changes in
loop(). - Either way → the 1‑second
/statepoll refreshes the page.
2Install the required libraries
Same async stack as Project 7: install both: ESP Async WebServer and AsyncTCP.
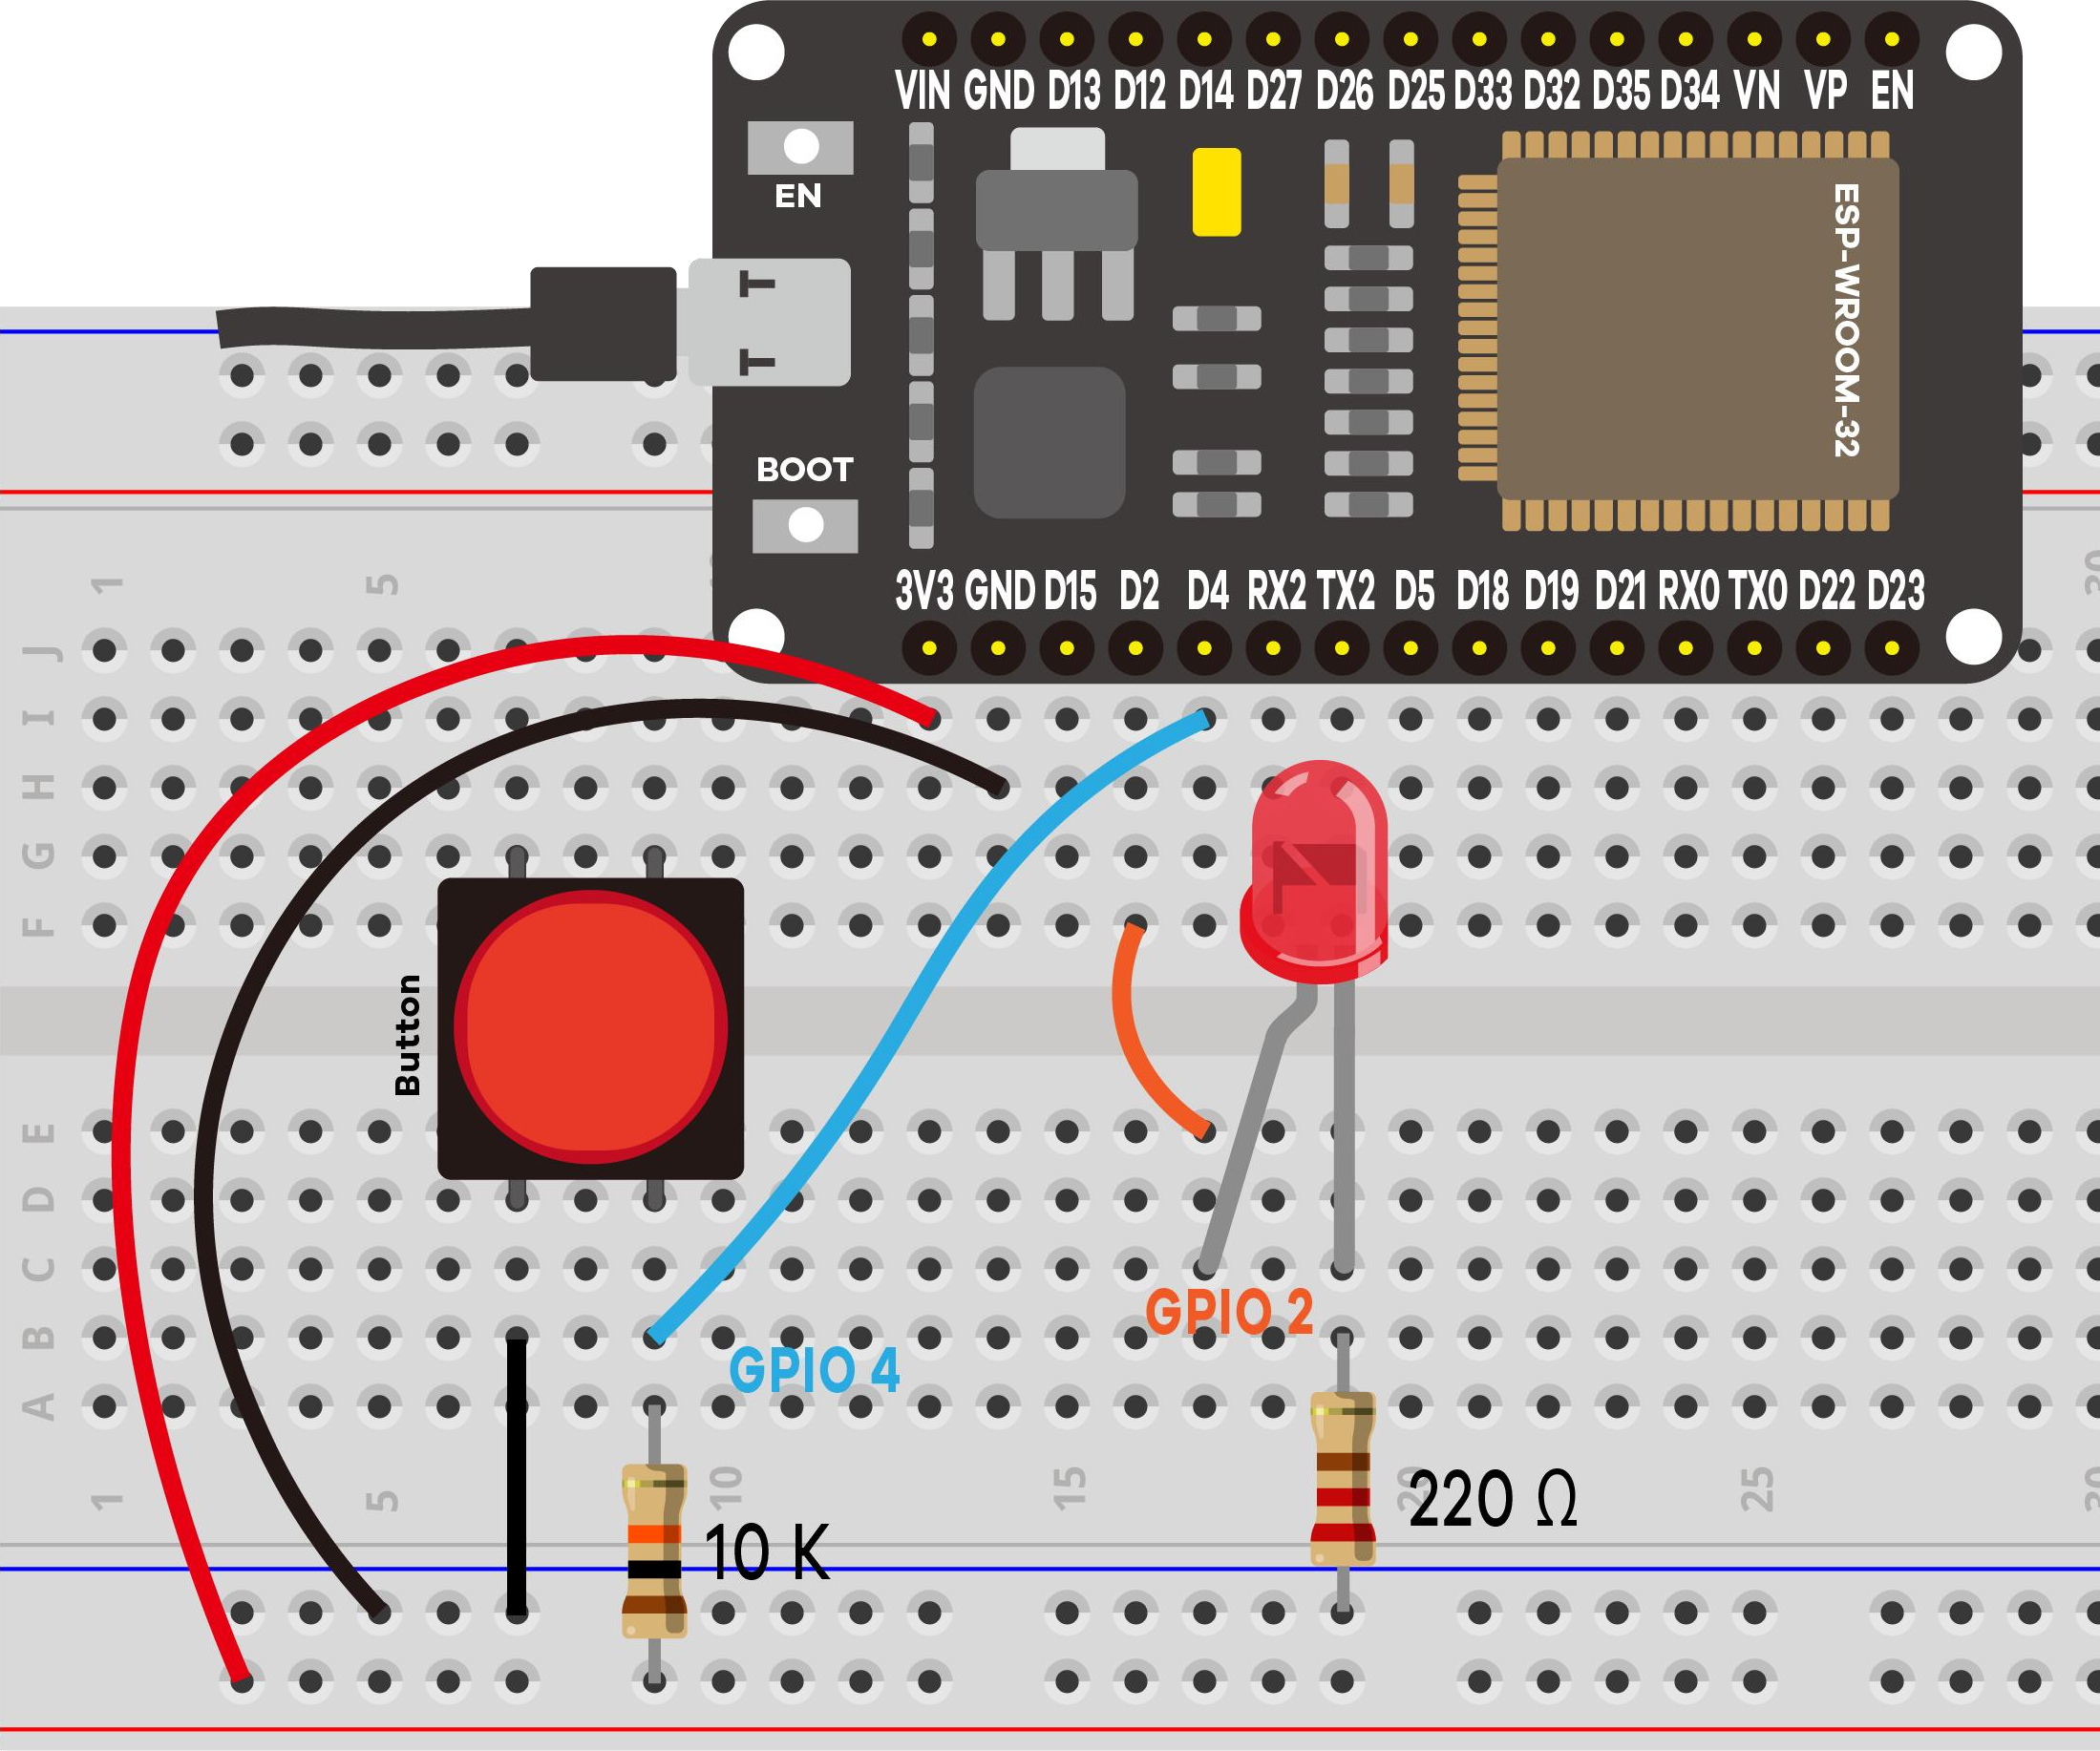
3Parts & wiring
| Qty | Part | Notes |
|---|---|---|
| 1 | ESP32 · breadboard · jumper wires | - |
| 1 | LED + 220 Ω | Output |
| 1 | Pushbutton + 10 kΩ | Input |
4Upload & use
Set your Wi‑Fi credentials, upload, open Serial Monitor at 115200, press EN/RESET:
==============================================
 Project 8: Output State Synchronization
==============================================
Output (LED) -> GPIO 2
Button       -> GPIO 4
Control it from the web page OR the button.
Connecting to Wi-Fi: MyNetwork
....
Wi-Fi connected!
Open this address in your browser:  http://192.168.1.42
----------------------------------------------
[BUTTON] Output -> ON
[WEB]    Output -> OFF
The improved logging tags which control changed the output ([BUTTON] vs [WEB]), so you can watch the sync happen.
5Code Walkthrough: Understanding the Sketch
This is Project 7's async server plus one new idea: the browser keeps asking what the real state is.
Step 1: what the sketch has to remember
const int output    = 2;      // LED -> GPIO 2 (also the on-board blue LED)
const int buttonPin = 4;      // physical button -> GPIO 4

int ledState = LOW;           // the state we intend the output to be in
int buttonState;              // the debounced reading
int lastButtonState = HIGH;   // the previous raw reading

unsigned long lastDebounceTime = 0;
unsigned long debounceDelay = 100;
ledState is the single source of truth. Both the web route and the button change this one variable, and loop() writes it to the pin. That is what stops the two controls fighting: they do not drive the pin directly, they agree on a variable.
Step 2: the page asks for the state once a second
setInterval(function () {                 // every 1000 ms
  var xhttp = new XMLHttpRequest();
  xhttp.onreadystatechange = function() {
    if (this.readyState == 4 && this.status == 200) {
      document.getElementById("output").checked = (this.responseText == 1);
    }
  };
  xhttp.open("GET", "/state", true);      // ask the ESP32
  xhttp.send();
}, 1000);
XMLHttpRequest fetches a URL without reloading the page, and setInterval repeats it every second. When the reply arrives, the toggle and label are updated to match. That is why pressing the physical button moves the on-screen switch a moment later.
Step 3: setup() registers three routes
server.on("/", HTTP_GET, ...);        // the page

server.on("/update", HTTP_GET, [](AsyncWebServerRequest *request){
  if (request->hasParam(PARAM_INPUT_1)) {       // ?state=0|1
    String inputMessage = request->getParam(PARAM_INPUT_1)->value();
    digitalWrite(output, inputMessage.toInt());
    ledState = !ledState;
  }
  request->send(200, "text/plain", "OK");
});

server.on("/state", HTTP_GET, [](AsyncWebServerRequest *request){
  request->send(200, "text/plain", String(digitalRead(output)).c_str());
});
The third route is the whole trick, and it is tiny: /state reads the pin and replies with a single character, 0 or 1. No HTML, no formatting. That is all the browser needs to redraw its toggle.
/update: it writes the requested value and then flips ledState. That works only because the on-screen toggle always sends the opposite of what it is showing, and the one-second poll keeps it showing the truth. ledState = inputMessage.toInt() would express the intent more directly and survive a repeated request.Step 4: loop() reads and debounces the physical button
int reading = digitalRead(buttonPin);

if (reading != lastButtonState) {
  lastDebounceTime = millis();          // input moved: restart the timer
}

if ((millis() - lastDebounceTime) > debounceDelay) {
  if (reading != buttonState) {         // stable long enough to trust
    buttonState = reading;
    if (buttonState == LOW) {           // act on one edge only
      ledState = !ledState;
    }
  }
}

digitalWrite(output, ledState);         // apply the agreed state
lastButtonState = reading;
This is the millis() pattern from Project 4 used as a debounce: every time the raw reading changes the timer restarts, so the sketch only trusts a reading that has held still for 100 ms. Project 1 used a blunt delay(50) for the same job, which is fine when the program has nothing else to do. Here it would stall the web server.
The sketch toggles when the debounced reading goes LOW, so it expects the button to read HIGH at rest and LOW when pressed (10 kΩ pull-up to 3.3 V, button to GND). Wired like Project 1 instead (pull-down), it still toggles once per press, just on the release.
Key concepts: what each line really does
| Code | What it does |
|---|---|
ledState | The single variable both controls agree on. Neither writes the pin directly, which keeps them consistent. |
setInterval(fn, 1000) | Browser-side timer: runs fn every second, forever, without reloading the page. |
XMLHttpRequest | Fetches a URL in the background from JavaScript. The page updates itself from the reply. |
server.on("/state", ...) | A minimal endpoint returning just 0 or 1, cheap enough to call every second. |
String(digitalRead(output)) | Reads the actual pin, not the variable, so the browser is told the physical truth. |
reading != lastButtonState | Detects that the input moved at all, restarting the debounce timer. |
(millis() - lastDebounceTime) > debounceDelay | Non-blocking debounce: trust the reading only once it has been stable for 100 ms. |
digitalWrite(output, ledState) | Applied every pass, so whichever source last changed ledState wins, with no conflict. |
6Demonstration
7Knowledge Check
Test your understanding.
1. How does the web page stay in sync when a physical button changes the LED state?
2. What does `setInterval()` do in the browser JavaScript?
3. Why is `loop()` not empty in this project unlike Project 7?
4. What does the `/state` endpoint return?
8Wrapping Up: What You've Learned
This project answers a question every real device faces: how does the interface know what the hardware is actually doing?
- Route every control through one state variable rather than letting each input write the pin. Two sources of truth become two different answers.
- A web page is a snapshot: it shows what was true when it loaded, and the ESP32 cannot push an update to it on its own.
- Polling fixes that: the browser asks
/stateevery second and redraws itself. Simple, and good enough for a dashboard. - Polling is also wasteful: one request per second per browser whether or not anything changed. That cost is why Project 11 moves to MQTT, where the device announces changes instead of being asked.
- Going further: a WebSocket (a single connection both sides keep open, instead of one short-lived request per poll) would fix the same waste while staying plain HTTP: the ESP32 could push
/statethe instant it changes, with no polling interval to tune. MQTT, which Project 11 uses instead, is the same idea taken further: a broker in between that many devices can publish to and subscribe from, not just one browser talking to one board. XMLHttpRequestplussetIntervalupdates part of a page without reloading it.- Debouncing with
millis()instead ofdelay()matters once the program has another job. Project 7's emptyloop()is exactly the room this project needed.
Now try
- Third input source: Add a second physical button on a different GPIO and track which input (web, button A, or button B) last changed the LED state.
- Simple password: Add a basic authentication check to the web page so only users who enter a password can toggle the LED.
9Troubleshooting
| Symptom | Likely cause | Fix |
|---|---|---|
| Compile error (async libs) | Libraries missing | Install ESP Async WebServer + AsyncTCP |
| Page doesn't follow the button | /state poll blocked | Keep the tab open; same LAN |
| Button does nothing | Wiring / debounce | Check GPIO 4 + 10 kΩ; press firmly |
| Stuck on "Connecting…" | Wrong credentials / 5 GHz | Fix credentials; use 2.4 GHz |